Thursday 31 October 2013

Yam and Fish Balls

This one's for all the yam fans out there. I personally have never really liked yam except it's fried or pounded. Infact one of the worst punishments I served as a child was when my mum forced me to eat boiled yam and stew, it was like asking me to eat fire wood. I hated it so much and when you really hate a particular food that's when my mum decides to cook it for breakfast, lunch and dinner and you dare not waste or else her dreaded cane will pay you a visit. Looking back now, I know she was just trying to teach us not to be picky or wasteful, her cane instilled the fear of God in us though and now as an adult, I can't stand picky or wasteful people. As much as my mum didn't want me to be picky, she also loved me too much to subject me to eating boiled yam all the time so she discovered a way to boil it, fry it and also enrich it with one of my favourite proteins in the world, Fish. The first time she prepared yam and fish balls, I remember the aroma wafting through the house, it was heavenly. When I finally tasted it, words could not express how I felt at that moment. Have you ever tasted something so good that your eyes water? Well maybe it only happens to me because of my love for good food (yeah I'm weird like that). Anyway when my mum saw how much we loved it, she knew the yam wasting days were over, smart woman my mum. So I told myself that if I happened to get married to someone who isn't a big yam fan, I had a recipe in my food armory that will knock his socks off. Fortunately I didn't have to worry about that because my husband turned out to be one of the biggest yam fans I've ever met. He can eat it boiled, fried, pounded, marshed, just name it, so long as it has yam in it, he's game. So I made yam and fish balls for him and I could have sworn I saw him levitate when he tasted it ( maybe I was seeing things) but people do weird things when they're enjoying a good meal though. My friend Vera has itchy ears when she's enjoying her food, so you see my watery eyes aren't so weird afterall (Shout out to Vera, CEO VeraNora Couture, love you boo). So yam fans, non-yam fans hope you enjoy this meal.

Prep Time: 15 minutes

Cooking Time: 30 minutes

Servings: 4

INGREDIENTS

1) Yam ( 3 large round slices)

2) Fresh fish ( Any fresh fish or 2 cans of sardine)

3) Salt ( to taste)

4) Ground dried pepper (to taste)

5) Curry (1 teaspoon)

6) Onion ( 1 medium bulb, chopped thinly)

7) Vegetable oil

8) Eggs (4)

PREPARATION

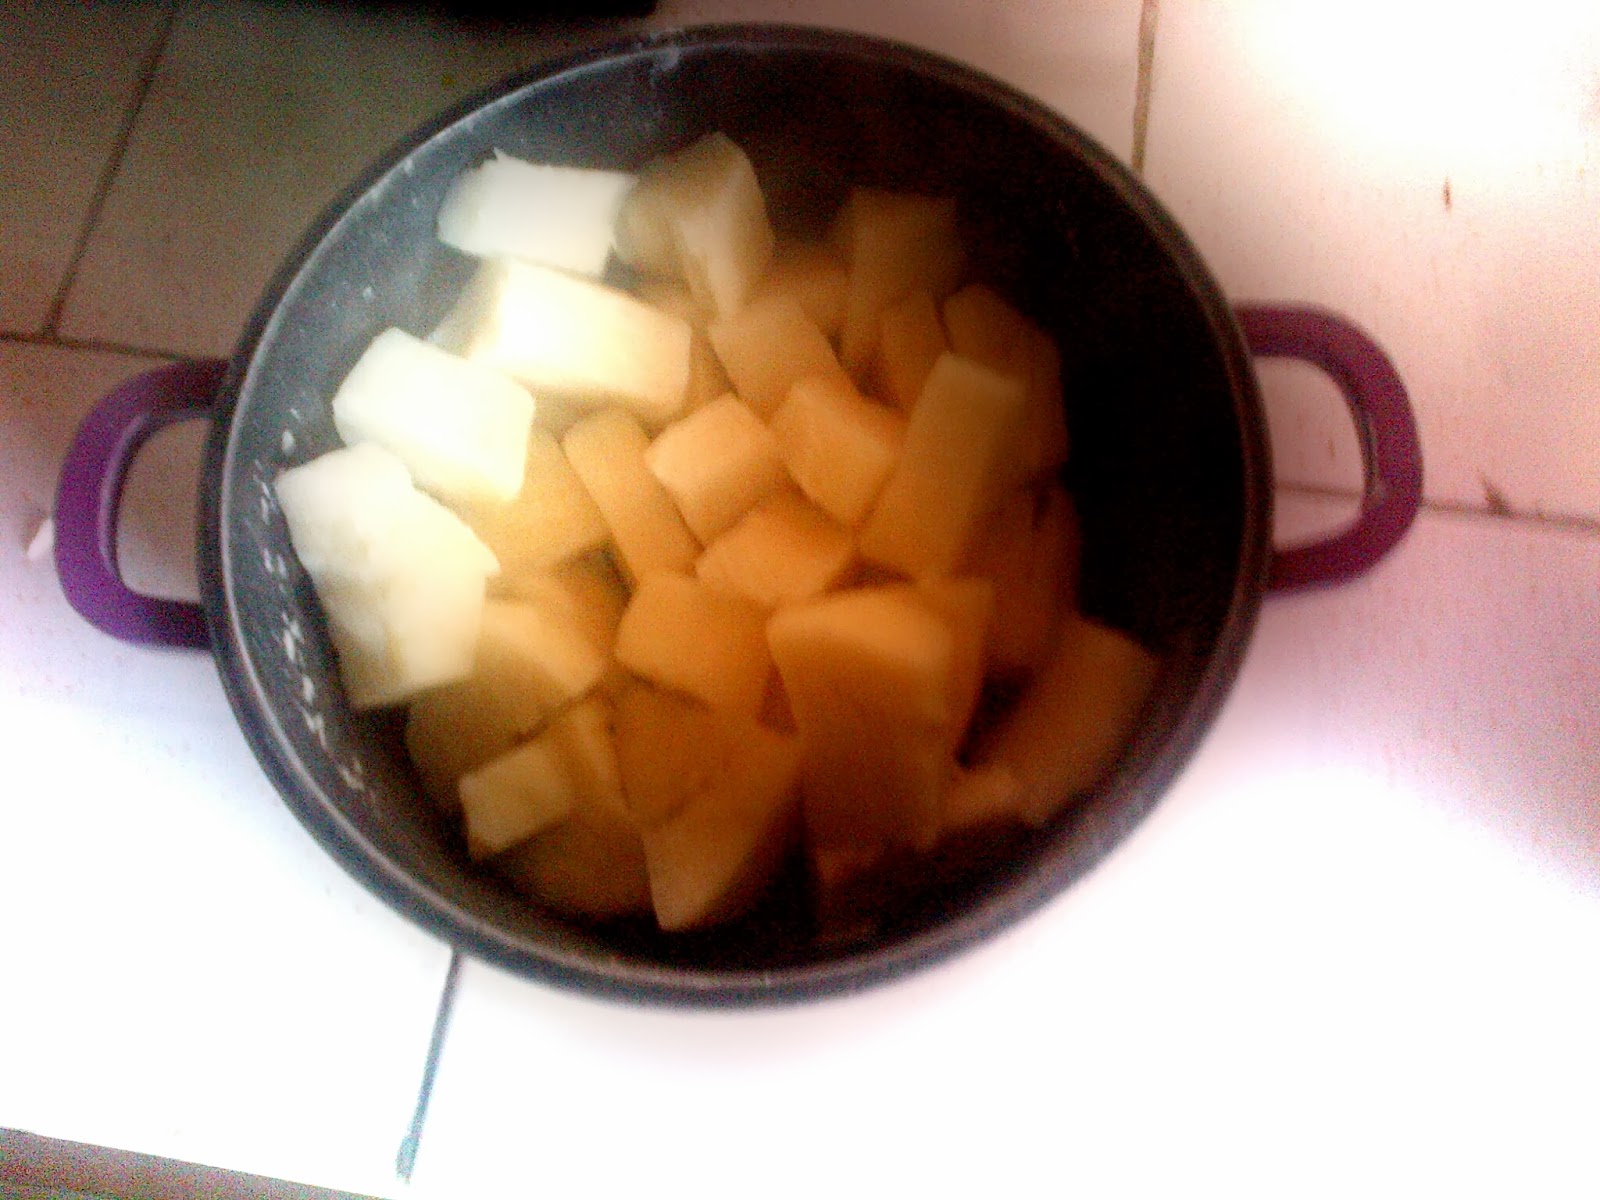
1) Peel and chop the yam in cubes ( as shown in the picture below). Wash yam to get rid of any sand and boil in salted water till it is soft ( this should take about 20 mins). Make sure the yam is properly cooked and if possible a little bit over cooked but not enough for it to start melting. The yam needs to be soft enough so it can easily be marshed.

2) While the yam is cooking, flake the fish using a fork ( if you're using sardine, do not include the oil because the balls will be deep fried so adding sardine oil will make them greasy).

3) When the yam is cooked, drain out any water left and marsh the yam in a bowl while it's hot using a potato marsh ( you can also use a mortar and piston to marsh the yam but be careful to stop pounding before it starts coming together because the idea is to marsh the yam and not to make pounded yam, that is why I prefer using a potato marsh because I know there won't be any chance of it forming pounded yam ). When it is completely marshed, remember it doesn't have to be perfectly smooth, add all the seasonings,  add a little salt too. Add the flaked fish, chopped onions and mix with a spoon so everything blends well with the marshed yam.

4) Pre heat some oil in an electric deep fryer to about 250 degrees or if you don't have one, pour some oil in a pot till it's half full and heat ( the oil needs to be very hot so the  balls start frying immediately you drop them in, if the oil isn't  hot enough, they soak up the  oil). Whisk 2 eggs and add it to the yam mixture (this will help bind the yam). Whisk the remaining eggs and set aside.  Scoop some of the yam with your hands and gently roll into a ball ( be careful not to squeeze ) then dip it in the egg wash (the whisked eggs you set aside) and place on a flat plate. Do this for each ball, when placing the balls on the plate, make sure they don't touch each other becuase they'll stick and when you try to separate them they start falling apart. You will know the oil is hot enough when you put one ball in and it starts frying immediately. After frying, place on paper towels to absorb some of the oil.

Voila, you have your yam and fish balls. It can be served as a meal or a snack. Any excess can be refrigerated and eaten the next day ( I think it tastes even better after a day). Enjoy!!

Friday 18 October 2013

Native soup..... The Rivers way!!

Native soup is the general term used to describe particular kinds of soups from various tribes in Nigeria. For example, in Cross Rivers  and Akwa-Ibom state we have Edikang-ekong (Oops! Hope I spelt that right), Afang soup, Fisherman soup, which happens to be one of my all time favourites and so many others. In Edo state we have Ogbono soup, Banga soup, Black soup ( don't judge it by it's name; it is finger licking, gum smacking delicious and also has medicinal properties) e.t.c Now in Rivers State  it's almost like every family has their native soup because there are so many tribes. You would think each tribe would stick to a  particular recipe but no, the tribes are further broken down till they have small villages, some as small as a distance of 1 km and they don't speak the same language as the neighbouring village, how much more share the same recipe for soup. So you see why it feels like every family has it's own soup recipe .I'm from Edo state but I was born and raised in Rivers and I'm married to one of it's finest *wink*, so I know what I'm talking about.  Being a food lover, I tried to explore all these recipes but half way through my adventure, it dawned on me that I might not be able to go through all of them in my life time so I decided to leave the rest of the adventure to my future generation. Here is the surprising part, in Rivers State there's a type of soup known as Native soup. There's no other vernacular name attached it, it is just known as "Native soup" plain and simple. If you go to a restaurant and you order for Native soup, they won't as you what kind because they assume that you are talking about the "Native soup", so they simply bring this soup. So I've decided to share my "Native soup" recipe with y'all. This recipe was inspired by my good friend Onimim Karibo a.k.a Fifi, I tweaked it a little just to add my magic. Enjoy!!

PREP TIME: 30 minutes
COOKING TIME: 1hr 30mins
DIFFICULTY: Intermediate
SERVINGS: 10


INGREDIENTS

1) Beef or Goat meat or both

2) Stock fish

3) Roasted periwinkle ( it's a bit more expensive than the fresh one but it is worth it)- (2cups or as desired)

4) Whelks (English) or Ngolo (Kalabari)- ( 2 cups or as desired)

5) Fresh shrimps ( large ones)

6) Snails ( as desired)

7) Oysters (English) or Ofingor (Kalabari)- (as desired)

8) Uziza leaf ( a small bunch )

9) Fresh pepper or Ata Rodo (Yoruba) or Scotch Bonnet ( Spanish )

10) Salt ( To taste )

11)  Red Onion ( 2 medium sized)

12) Knorr stock cube ( 3 cubes)

13) Ofor ( 2 tablespoons or more if necessary )

14) Palm oil ( 1 cooking spoon )

PREPARATION

1) Wash and season meat with salt and 1 knorr cube  add one chopped onion and steam ( Check Goat meat pepper soup recipe for best way to steam meat). While the meat cooks, prepare the other ingredients, for example wash the periwinkle properly because roasted periwinkle usually has some sand in it, wash the whelks ( they are usually cleaned in the market but if they aren't, clean by peeling off the soft skin, after which you will notice a dark greenish or black spot, pull it out with your fingers and you're good but in order to save time just ask the seller in the market to clean it), peel and de-vein the shrimp ( simply remove the head, peel off the back, use a knife to slightly open the back of the shrimp I.e from up to down, you'll see a thread like vein, remove it and you're good to go), wash and chop the leaves, blend the pepper and remaining onions till smooth.

2) At this point the meat should be cooked,  if not add a little more water and leave to cook for some minutes. While the meat is cooking, rinse the stock fish with some water, season with salt and knorr cube , add some water till it just cover the stock fish. Cook for about 15 minutes or until  it's soft enougn to chew. When the stock fish is cooked, add the fish and the stock to the meat, this will concentrate the taste of  the soup some more, since the meat stock is the base of the soup.

3) Season the snail with salt and knorr cube, add enough water to cover the snail half way and steam for 10 minutes ( Ravineux Tip: I prefer my snail not too hard not too soft, so I cook it for a very short while, it will still be a bit hard but that's not a problem because the rest of the cooking will be done inside the soup, this way the soup permeates the skin of the snail and gives the snail a richer taste).

4)Add the blended pepper, palm oil, shrimps and snails to the steaming meat and stock pot, leave to cook for about 5 minutes so the palm oil can mix the rest of the stock and the shrimp can cook properly ( Ravineux  Tip : I like to cook my shrimp in meat stock rather than plain water. So whenever you have a recipe that requires you to cook your shrimp, try cooking it in any left over meat stock you have in your fridge, you'll notice how different and rich the shrimp will taste). Add the rest of the ingredients and the ofor (ofor is the yellow powdery substance shown in the first picture, on the top left extreme, it is used as a thickening agent for soups and other delicacies. It is mostly used by the Ibos). You might not notice the ofor at work immediately it is added but when the heat is turned off and the soup begins to cool, it will go from a watery consistency to a slightly thicker consistency. Be careful not to add too much because when the soup has had time to cool off, it will be as thick as custard. (Ravineux Tip : Some people have allergic reactions to ofor, in a situation like this, I prefer to use garri as a thickening agent or pounded yam. The starch in both help to thicken what ever you use them for). Finally add the chopped uziza leaves. This is the last ingredient to be added so it doesn't over cook.

There you have it, Native soup...  the Rivers way!!!

Thursday 10 October 2013

Goat meat pepper soup and long grain rice

The rainy season is here once again, although my least favourite season, it gives me an excuse to use a lot of pepper and I'm not talking about the mild peppers that are ever so gentle on your pallet and when you eat them, you're unable to tell if you're eating a pepper or strawberries . I'm talking about the real deal peppers that come packed with so much heat, you get teary eyed and runny nose just standing around them and when used to cook, they warm you up on any cold rainy day. Now down here in the south south region of Nigeria, specifically Rivers state  Port Harcourt, when it rains it pours. So on this particular rainy day, the wind was blowing, the rain was pouring cats, dogs, cows, goats and all d farm animals. The cold was really getting to me ,  I needed some heat and I knew that a hot cup of cocoa wouldn't do a thing, then I remembered that I had this beautiful goat meat, chopped and waiting to fulfill it's purpose here on earth and I was ready to make it's dreams come true. So I decided to prepare the goat meat pepper soap and long grain rice. Now be careful when you're buying goat meat because not all goat meat are tasty. Always buy the male goats because they're are more tasty and cook faster  since the meat is not as tough as that of the female goat. I know you guys would love to try this simple but wonderful recipe

Servings: 4

Prep time: 15 minutes

Cooking time: 1 hour

Difficulty: Easy

INGREDIENTS

1) Goat meat ( 500g, chopped  in small pieces but not too small)

2) Fresh pepper or Ata Rodo (Yoruba) or Scotch Bonnet (Spanish)- ( To taste)

3) Ehu or Ariwo or Calabash nutmeg ( 2 seeds)

4) Uziza seeds (1/4 teaspoon)

5) Onion ( 2 medium sized bulbs)

6) Scent leave or Mbedenji (Ibo)- ( 1 small bunch)

7) Salt ( To taste)

8) Long grain rice

9) Knorr stock cube ( 1 cube)

PREPARATION

1) Wash the goat meat  properly to get rid of any sand or dirt on it, after which put in a pot. Chop one onion and add it to the meat, season with salt and knorr cube. Cover the pot and leave to simmer for about 30 minutes. ( Ravineux Tip: When I steam meat, I don't add any water at first, just the onions and seasoning. As it steams, the meat releases it's own stock and cooks in it. In situations where I don't need the stock for anything else, I allow it to cook till it dries but if I need the stock, I add a little water after the meet has cooked in the stock for a while. This method gives a more concentrated stock that tastes great)

2) Blend pepper and onion together. Use a mortar and piston to grind the Ehu or calabash nutmeg and uziza seeds together till smooth. Wash scent leaves and roughly chop them.

3) Add a little water to the meat, remember the stock is soup so you want to have enough to go around. When the meet is semi cooked, add the blended pepper and spices, cover and leave to cook properly. If the stock reduces some more, add a little more water so you won't be left with  cooked goat meat and no pepper soup. When the meat is cooked ( to be sure, cut a piece of meat and chew, that way you'll be sure if it's soft enough), add the chopped scent leaves, cover  the pot with the lid and turn off the heat, the steam from the pepper soup will cook the leaves.

4) Cook the rice in salted water , when it's ready serve with the goat meat pepper soup.

Mine turned out perfect and it was the most delicious cure for a cold. Try the recipe and tell me how yours  turned out. Enjoy!!

Wednesday 9 October 2013

Red velvet cup cakes with oreo and coconut butter cream frosting

There's a crase for sugar craft , more specifically  fondant icing and it's being going on for quite some time . Sugar artists have sculpted and built awesome things with fondant. You talk to a bride-to-be and she's day dreaming about her 12 tier cake covered in all white fondant with white fondant angels ascending and descending the cake and so on and so forth. So what about those of us who love beautiful cakes but haven't been beaten by the fondant bug and are taking precautionary measures to make sure we don't get beaten. I'm sort of a sugar artist myself but I'll pick a cake covered in tasty butter cream frosting or chocolate ganache over a fondant covered cake any day. What about cupcakes with frosting? aren't they the cutest little things? Some times I make some really cute cupcakes and I can't bring myself to eat them cause I just want to stare at them all day. So here's a little something for my bug free food lovers.

Prep tims: 45 minutes

Bake time: 25 minutes

Servings: 16 cupcakes

Difficulty: Easy

INGREDIENTS

1) Flour (150g)

2) Butter (100g)

3) Sugar (130g)

4) Eggs (2 large)

5) Baking Soda ( 1/4 teaspoon)

6) Baking powder (1/4 teaspoon)

7) Vanilla ( 1 teaspoon)

8) Salt ( 1/4 teaspoon)

9) Milk (1/4 cup)

10)   Cream (1/2 cup)

11) Ground Nutmeg (1/4 teaspoon)

12) Red food colouring ( 1 tablespoon)

13) Cocoa powder ( 1 tablespoon)

FOR FROSTING

1) Butter

2) Icing sugar

3) Vanilla ( 1 teaspoon)

4) Hot water  (1 tablesploon)

5) Oreos chocolate cookies

6) Dessicated coconut

7) Cherries

PREPARATION

Pre-heat the oven to 190 degrees

1) Cream the butter and sugar on high speed, using a stand mixer or a hand mixer, until it's light and fluffy.

2) Mix the dry ingrdients and sieve. ( Ravineux Tip: I sieve the dry ingredients at least three times. This helps to incorporate air into it and the cakes turn out  light, soft and succulent.  Desert cakes should not be dense or else it might as well be a pound cake)

3) Whisk the eggs in a bowl till you get a light yellow colour. Add vanilla, milk amd cream and whisk some more so they all mix properly.

4) Now add red food colouring, vanilla and nutmeg to the butter amd mix. Afterwards, add the flour  mix and egg mix to the butter in alternations starting with the flour mix and ending with it. ( Ravineux tip: When mixing the flour and egg with the butter , use a wooden spoon and mix in folding motion rather than stir I.e instead of going round and round like you do when stiring anything, go up and down and make sure not to over mix cause the more you mix the more gluten forms. I won't bore you guys with science jagon but just know that too much gluten leads to a hard cake. Small gluten perfect cake, too much gluten hard cake, lots and lots of gluten and you have yourself a baked rock)

5) Line the muffin tin with cupcake liners. Fill each cup half way with the batter. Bake in the oven for 25 minutes or till a tooth pick inserted in the middle of the cake comes out clean. Make sure not to leave the cake too long in the oven or else the cake comes out looking more like a chocolate cake rather than red velvet.

PREPARATION FOR FROSTING

1) Cream the butter on high speed. When it's light, gradually add the  sugar and mix. Add a tablespoon of hot water, this helps to soften the butter even further.

2) Add vanilla and mix. Share the mixture into two separate bowls. Crush the oreos and mix one part of the butter with oreos. When the cupcakes are cool, using a piping set, pipe  round swirling pattern over the cake or whatever pattern you desire. Pipe the oreo butter cream frosting over half the cupcakes and the plain butter cream frosting over the second half  then generously sprinkle the dessicated coconut over them. Top each cupcake with a cherry and there you have it, your cute little red velvet cupcakes. Enjoy!!

Wednesday 2 October 2013

Boiled yam with peppered stock fish in soy sauce

I woke up one morning with a hankering for stock fish, weird right? Anyway I tried eating other things hoping to satisfy my craving but the stock fish craving wouldn't burge. So I decided that if I was going to eat stock fish, I might as well prepare it in a fun way. So I start racking my brain trying to think of a way to turn this hard, funny smelling fish into a fun meal and so I remembered my big sister once preapared this mind blowing stock fish sauce for me but for the life of me, I couldn't remember the recipe, all I could remember was that the recipe had some onions and stock fish in it. So I decided to create my own recipe with the little I could remember and voila, it turned out great. Hope you enjoy it as much as I did.

Cooking Time : 1 hr
Servings: 2
Difficulty: Super easy

Ingredients

Yam ( quarter of a medium sized tuber)

Water

Stock fish (the body)

Onions (1 bulb)

Garlic (2 cloves)

Fresh pepper/Scotch bonnet (4 bulbs or as many as your taste buds agree with)

Green chili

Soy sauce (1 tablespoon)

Curry

Salt ( to taste)

Vegetable oil (1 cooking spoon)

Preparation

Wash the stock fish pieces and put in a pot with enough water to cover it. Salt the water and add some curry. Cook till the stock fish is soft enough to chew without developing a migrain in the process.
Cut and peel the yam, slice into as many pieces as desired, boil in a pot of salted water.
Chop the onions, garlic and peppers. Put the vegetable oil in a sauce and heat just enough to make the onions sizzle. First add the onions and garlic, allow them to cook till they are translucent.  Add the peppers and stir fry, season with a little salt  and curry ( TIP: be careful not to over salt since the stock fish wash already cooked with salt and soy sauce  also contains salt). After  stir frying the onions and peppers for about 5 minutes, add the stock fish. Since the stock fish is cooked and soft, it will be easy to use a wooden spoon to break large chunks into smaller pieces. Add the soy sauce, cover it up and leave to cook for 5 mins.
Serve with boiled yam or rice or whatever your adventurous heart desires.